
What is behind the tile in a shower
Tile is the surface you see, not the layer that keeps shower water contained. We explain what belongs underneath, where connections need attention, and what you should ask to see before tile covers the work.
 PSR Home Remodeling · · 5 min read

Tile and grout are not the waterproofing
A shower can have straight grout lines, neatly cut corners and a finished glass enclosure while something underneath is wrong. Tile and grout are not a waterproof assembly. Water can pass through grout joints and reach the materials behind the finished surface.
The waterproofing layer belongs behind the tile. Its job is to contain that water and direct it toward the drain, rather than let it reach wall cavities or adjoining rooms. Tile protects and finishes the surface, but it cannot replace that hidden layer.
We often see South Florida bathrooms built over concrete slabs, with block exterior walls and framed interior partitions. Concrete and block do not eliminate the need for shower waterproofing. Water can still migrate into adjoining materials or escape through an unfinished connection.
Before you choose tile, ask us to explain the shower assembly from the supporting surface to the finished face. You should understand where the waterproofing sits and how it connects to the drain.
The shower pan is more than the floor tile
The shower pan is the water-containing assembly beneath your feet. It includes the waterproof layer, its connection to the drain and its transitions at the walls and shower entrance. The visible tile floor is only its finish.
Different assemblies manage water differently. A traditional pan uses a liner beneath a mortar bed, with drainage openings at the drain that must remain clear. A surface-applied system places the waterproofing directly beneath the tile-setting material and connects it to a compatible drain.
Either approach needs a complete, compatible assembly. Randomly combining a liner, drain and wall membrane can leave connections that were never designed to work together. Adding more layers without a clear plan is not a substitute for following the selected system's installation instructions.
The entrance deserves particular attention. A curb needs waterproofing across its exposed surfaces and a properly detailed connection to the walls. A curb-free entrance needs a plan for containing water where the shower meets the bathroom floor.
If you want a lower entrance over an existing slab, discuss that before demolition. The floor construction, drain position and available space affect what is practical.
Wall waterproofing depends on the small connections
A strong tile backing is not automatically waterproof. Cement board can support tile, but the board alone does not create a continuous water barrier. Waterproof boards also need their seams, fasteners and connections treated according to the selected assembly.
Surface waterproofing may use bonded sheets or a liquid-applied membrane. Sheets need properly bonded seams and detailed corners. Liquid membranes need the specified coverage and thickness, with the required drying or curing between applications. A colored wall is not proof that the membrane is complete.
We pay attention to the places where the flat surface stops:
- Inside corners and the connection between walls and the shower floor.
- Recessed shelves, including their corners and lower ledges.
- Benches, curb tops and other surfaces that need to shed water.
- Openings around plumbing and attachments for glass or accessories.
A recessed shelf should direct water back into the shower, not hold it along the rear edge. Glass attachments also need planning so installation does not damage concealed waterproofing. Decide on shelves, benches and glass placement while those details are still accessible. Our our bathroom remodeling page explains the broader work we handle.
Slope must exist beneath the finish
The shower floor needs a continuous slope toward the drain without low spots that hold water. The waterproof drainage layer also needs the slope required by its assembly. Tilting the visible tile over a flat traditional pan liner does not correct the hidden drainage problem.
Drain placement affects the floor shape and tile layout. Tile size matters because the finish needs to follow that shape without awkward edges or pockets. Choose the drain arrangement and shower floor tile together, before the floor is formed.
In a traditional pan, water reaching the liner needs a path through the drain's drainage openings. In a surface-applied assembly, the membrane needs a properly formed connection to its compatible drain. These are different details, not interchangeable parts.
Ask to see how the floor drains before accepting the finished shower. Water collecting beside the curb or sitting in a recessed shelf is a detail to investigate, even when the tile looks neatly installed.
The flood test happens before tile covers the pan
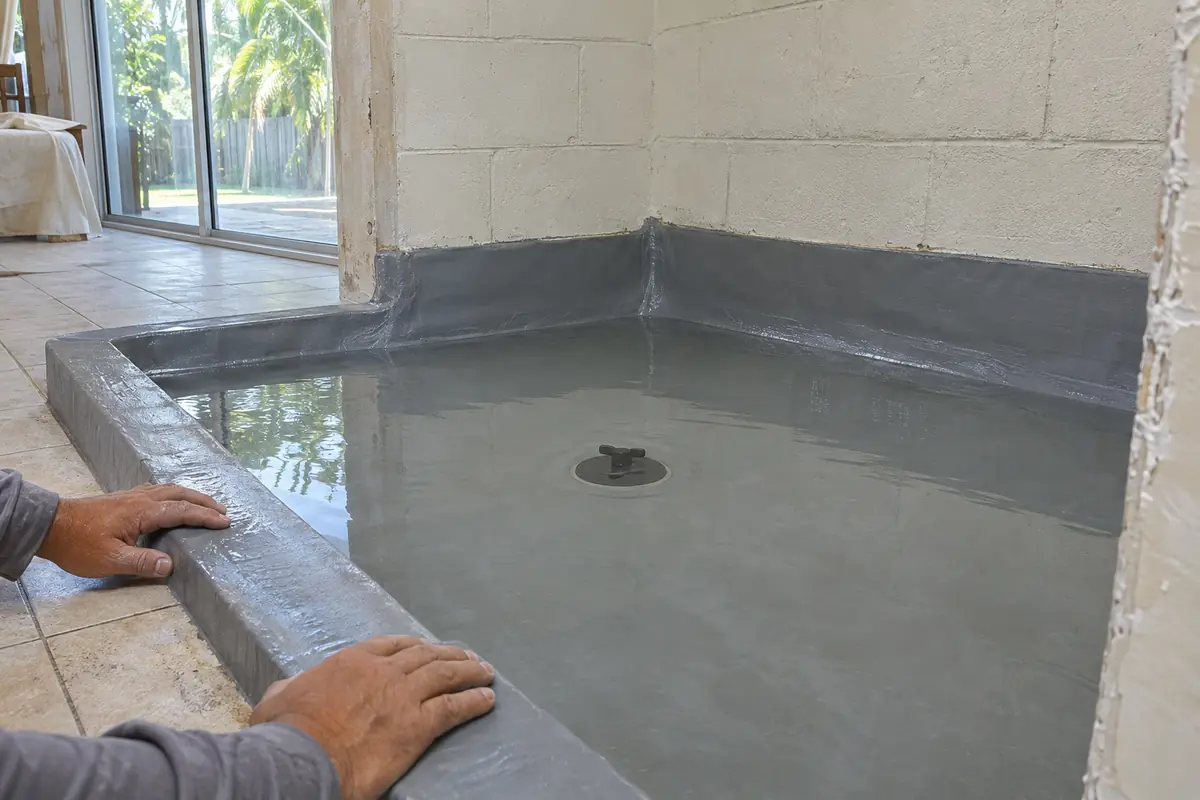
A flood test checks whether the completed pan assembly holds standing water before tile hides it. The waterproofing must first be ready for testing under its installation instructions. Testing too early can damage material that has not finished curing.
The installer plugs the drain at the appropriate location to include the connection being tested, fills the pan to the required test level and monitors it for leakage or an unexplained change in water level. The test conditions and any inspection requirements depend on the assembly and your building department.
Ask for photographs of the completed waterproofing and the recorded test result. If the pan fails, the next step is to find the cause, repair the assembly and repeat the test before tile installation.
A successful pan test does not check every wall detail. Upper seams, plumbing openings and shelf connections still need inspection. When your project requires a permit, we pull it, answer the plan reviewer, meet every inspector and close the permit. Ask your building department which inspections apply before concealed work is covered.
Why a hidden failure can appear later
A small opening may only admit water when spray reaches a particular corner or water collects near the entrance. Repeated wetting can allow moisture to travel before a stain or loose finish becomes visible. South Florida humidity can also slow drying, making the source harder to separate from ordinary surface dampness.
A stain beside the shower does not identify the cause by itself. Plumbing, the drain connection, the pan or another detail may need investigation. Fresh grout or surface sealant cannot repair a failed membrane behind the tile.
If you are planning a remodel, ask for the waterproofing method, drain connection, slope plan and testing stage in the written scope. Those details deserve a decision before the finishes arrive.
Start with a free in-home estimate to review your shower, or call (866) 826-5523.
Written by PSR Home RemodelingLicensed and insured remodeling contractor serving Broward, Miami-Dade and Palm Beach counties. 804 NW 21st Terrace, Miami.

