
The order a kitchen remodel actually happens in
A kitchen remodel follows a sequence because each trade needs something from the trade before it. We explain what happens while the walls are open, why countertop measuring waits for cabinets, and where your decisions keep work moving.
 PSR Home Remodeling · · 5 min read

Decisions and permits come before demolition
Your kitchen remodel starts with a settled layout, not a demolition tool. Before we remove cabinets, we need to know where the sink, appliances, outlets and lighting belong. Moving a sink across a kitchen with a concrete slab floor involves different work than replacing it in the same location.
We also need the actual appliance specifications. A refrigerator opening, range connection and dishwasher location should match the equipment you intend to install. Choosing appliances after cabinets are ordered can leave you revising finished decisions.
We prepare the construction design and handle the permit process for the work that needs it. We pull the permits, answer the plan reviewer, meet every inspector and close the permit. Structural changes, such as removing a load-bearing wall or adding a beam, need drawings signed and sealed by a Florida-licensed engineer or architect before the building department issues a permit.
If you own a condo, ask your association about approval requirements, work access, elevator reservations and debris removal before demolition is arranged. You should also decide where you can prepare meals while the kitchen is unavailable. Our our kitchen remodeling page explains the service; the sequence below explains how the work fits together.
Demolition exposes what the rough work needs
After protection is in place and affected utilities are safely disconnected, demolition removes the cabinets, counters and finishes included in the scope. We open the walls and floor where the new layout requires access. What comes out depends on what you are keeping.
In South Florida homes, we often see concrete slabs, block exterior walls and interior framed partitions in the same kitchen. Those surfaces do not accept plumbing and electrical changes in the same way. An opened wall can also reveal a pipe or connection that was not visible during planning.
This is the point to review unexpected conditions before covering them again. If suspect materials need testing for asbestos or lead, or conditions call for mold assessment, licensed specialists handle that work.
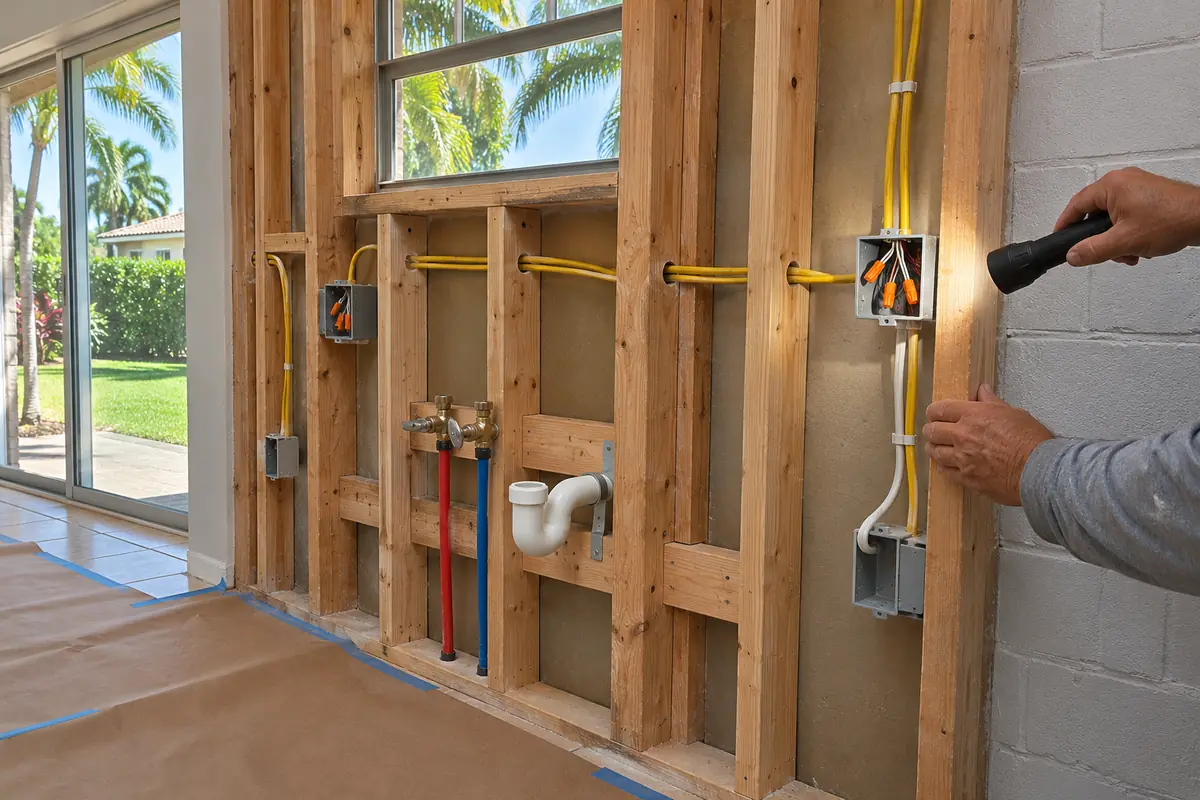
Next comes rough plumbing and electrical. This is the hidden work: supply and drain connections, appliance feeds, outlet locations and wiring for lighting. Any planned ventilation work also needs coordination while access is available. You should confirm sink placement, lighting locations and appliance choices before these connections are established.
The walls stay open for rough inspections
New drywall can make a room look ready for cabinets, but appearance is not the checkpoint. The inspector needs access to the rough work covered by the permit before it disappears behind finished surfaces. We keep those areas accessible until the required inspection is completed and any corrections are addressed.
Covering the work too soon can mean opening the wall again. Photographs can help document construction, but you should not assume they replace an inspector seeing the installation. Inspection requirements and scheduling depend on your building department.
Once the applicable rough inspections are approved, the wall openings can be closed. Drywall joints are finished, patches are blended and surfaces are prepared. Primer and an initial paint coat may happen here, while access is easier. Final painting and touch-ups usually come later.
Flooring also needs a deliberate place in the sequence. Some installations extend beneath cabinets; some floating floors need room to move and should not be trapped beneath fixed cabinetry. We coordinate the selected flooring with cabinet support, finished floor height and appliance clearance before installation begins.
Cabinets establish the countertop measurements
Cabinets are set, leveled, secured and aligned before the countertop template is taken. Fillers, finished panels and the island position need to be settled too. The countertop fabricator needs the installed cabinet arrangement, not just the dimensions on a drawing.
A drawing shows the intended layout. A template records the actual support surfaces, wall conditions, corners and overhangs after installation. Block and stucco walls are not always straight, and a floor can need adjustment beneath the cabinet bases. Those details affect how a counter fits.
Measuring before the cabinets are set leaves important conditions unresolved. Moving an island or changing a cabinet after templating can require another measurement and changes to fabrication.
Before the template appointment, have these choices settled:
- The sink and its installation method, with the required sink information available.
- The faucet and any accessories that need holes through the counter.
- The cooking appliance and its required opening, if applicable.
- The counter edge, overhangs and any countertop material continuing up the wall.
Counter fabrication follows templating. This creates a pause in visible kitchen progress even though work is happening elsewhere. Keep the installed cabinets clear and avoid changes to their position during this stage.
Counters come before backsplash and final connections
Once fabricated, the counters are installed on the prepared cabinet bases. The sink is fitted according to the selected installation method. Plumbing connections follow when the installation is ready for them, rather than simply because the counter has arrived.
The backsplash generally follows the counters because its lower edge needs to meet the actual countertop surface. Starting tile from an assumed counter height can leave an awkward gap or cut. If you choose countertop material for the backsplash, its measuring and installation requirements need separate coordination.
After backsplash work, we complete the remaining paint work and touch-ups. South Florida humidity can affect drying conditions, so coatings and setting materials need suitable conditions before the next activity proceeds.
Finish electrical and plumbing work brings the visible pieces together: outlet covers, light fixtures, the faucet, disposal and appliance connections. These are different from the rough connections inspected inside the walls. Required final inspections still need to be completed as part of closing the permit.
The punch list checks how the kitchen works
A kitchen can look finished while still needing adjustments. The punch list is a room-by-room check of the remaining details, not just a look at the new finishes.
We check cabinet doors and drawers for alignment and movement, look at hardware and trim, and review paint touch-ups. We also check accessible plumbing connections during operation and confirm that installed fixtures and appliances can be used as intended.
You should walk through the kitchen with us and point out anything that needs attention. Open the drawers, look inside the sink cabinet and review the finished edges. Keep care instructions for the surfaces and equipment you selected.
The useful question throughout the remodel is simple: what needs to be complete before the next trade starts? Rough inspections come before closing walls. Set cabinets come before countertop templating. Installed counters establish the backsplash starting point. Following those dependencies gives you a clearer picture of progress.
Start with a free in-home estimate or call (866) 826-5523 to discuss your kitchen layout and scope.
Written by PSR Home RemodelingLicensed and insured remodeling contractor serving Broward, Miami-Dade and Palm Beach counties. 804 NW 21st Terrace, Miami.

